Showing posts with label sewing. Show all posts

Saturday, October 18, 2014

Sugar Skulls

A lot of life and projects have happened since I was here last, but let's just jump to this project:

I posted this little tease on facebook, and I was happily surprised at how many people liked the sugar skull fabric.

This is what I made with it:
Matching dresses for Poppy and her doll, Becky.


Becky was Bethany's doll when she was a girl,
and we're delighted that Poppy loves her
as much as Bethany did.


Bethany says Poppy loved the sugar skull fabric when she opened the package, and she loved the dress when she unfolded it. But when she noticed the little doll dress that was included, she really got excited! She ran upstairs to put them on, and Bethany heard Poppy talking to Becky about loving the dresses. In fact, when Bethany heard a squeal of delight and asked what it was about, Poppy said, "Oh, that was Becky!" That makes me so happy!


Tuesday, May 13, 2014

Is this going to be as good as I hope it will be?

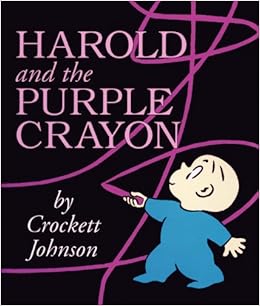
Do you remember this book?
Harold draws himself in and out of adventures and predicaments, all with his purple crayon. His story still delights me, as it did when I was a child. (I related to Harold especially since I shared the same round-shaped head.) I am encouraged to strike out and try something new, confident that any difficulty can be remedied with some creativity and some forward thinking. So, I venture to tell his story in a quilt, using methods that are new and experimental to me.
My drawing, hanging up as a reference.

There's a big, multi-guild quilt show here in June, and the theme for the challenge quilt is Children's Storybook. Make a 18"x22" mini quilt for exhibition and viewers can vote on their favorites.  "Of course!" I said. "I love children's literature!" I said. "What was I thinking?" I say, now. "I have too much to do!"
A patchwork background made of various neutrals,
and story shapes added with fusible webbing.

I thought about making something glittery with Rainbow Fish, or 3-D with the Very Hungry Caterpillar, or flowery with The Secret Garden. Those are good stories, and images that will catch the eye, and the votes. But the purple crayon is speaking to me these days, and I am going to put my time and energy into something that I like, that speaks to me.
A practice scrap, to see if stitching on the purple cording
with a zig zag will work. Yep, it works!

Finally committing to a healthy eating plan and taking off some unhealthy weight, taking steps to improve communication in my marriage, agreeing to take on a leadership role at my quilt guild, trying new approaches to reach students at work, saying yes to that still, small voice that is calling DH and me back into public service... These are all areas of my life where I'm engaging in adventures and predicaments.

Hmm, I wonder if I can glue the cording on first, to get the placement
I want, and stitch it on later. Yep, glue works!
I'm not going to push the metaphor too far, but the purple crayon symbolizes for me a "yes" response to possibilities and interactions.

At the end of Harold's story, he made his bed (Get it? He made his bed?) and drew up the covers (Drew up the covers!) and fell asleep. (I remember being amused by the play on words even when I was little.) I love spending time in my sewing room, where I get quiet  and thoughtful and peaceful. Have you heard this: Quilters lead pieceful lives.


Sunday, September 29, 2013

A masculine quilt

I have a new finish to show you.

I want to give a quilt to my nephew for Christmas this year.  Last year, it was my turn to give his brother a Christmas present, and I gave him this quilt.
This is not the new finish, this is last year's Christmas gift.
Keep reading for this year's Christmas gift!
It's made with upcycled Hawaiian shirts I got from a friend whose husband stopped working at Trader Joe's, where Hawaiian shirts were his uniform. I wondered if a quilt was a dorky gift for a young man in college, but, apparently, it was well received, and is well used.

For this year's, and this nephew's offering, I started out by asking my hive-mates in the 3x6 bee to make quilt blocks for me in autumn colors on black or gray backgrounds. the bold colors were a stretch for some of my partners, but they came through with some striking, powerful blocks. It was a good head start on a manly quilt.
Nope, this isn't it, either.
These blocks are on hold for another day,

Then I became part of a newly-formed online bee we call Stars in Their Eyes, and I changed my mind about what I wanted to make for Alex. For my month in the bee, my bee-mates made the most gorgeous feather blocks from Anna Maria Horner's feather bed tutorial.

I love their blocks, and happily made more to complete a quilt top that I thought my nephew would like a lot.

I took the quilt top to my lqs to get advice on how to quilt it. As we discussed ideas, my advisor wondered if the purple feather might be too feminine for my nephew. Of course, Alex is more mature and worldly than that, but that comment was enough for me to justify keeping this quilt top for myself. I love it so much!

Aha! New plan! I had these blocks, some of the first I'd ever made when I first started quilting, and from the first online tutorials and quilt-along I ever participated in.

They were made using the same batch of Hawaiian shirts I used for nephew Christopher's quilt. The linen was found in a big bolt at the thrift store. I like that the two brothers' quilts relate to each other.

I put the blocks together with a beautiful plaid fabric my sister Laura gave me a few years ago from her overflowing stash. I love the beach-y looking blocks with the mountain-y plaid. The backing is a plaid flannel, also from Laura's stash.

The quilt is straight-line and in-the-ditch quilted. My goal was to stabilize the linen, which has a tendency to unravel, and to enhance the fabrics and the block patterns.


The recommendations for the batting is that quilting lines be no more than 4" apart. Only one of the blocks has a center square larger than that.

To tack that block, I free-motion-quilted in the center. Because the fabrics are from Hawaiian shirts, I googled "Hawaiian symbols," and found a tribal turtle drawing that I like. I printed it, then cut out a stencil from it, and drew it onto the block with a washable marker. Then I fmqed around it.

Once washed, the ink was gone and the turtle motif is subtle. Part of me wishes I'd painted the turtle, because I like the bit of blue there, but I'm glad the turtle doesn't compete with the traditional blocks and the lovely fabrics.

The men in my house agree that it's a very handsome quilt. I'm proud to give this one to nephew Alex. I think he'll like it!


Monday, September 16, 2013

Curating

When I was in Pittsburgh this summer, Bethany gave me these sewing notions from a friend's relative's someone's clearing out. Treasures from the back of a drawer, this pile includes rusted needles, a real emery strawberry with thick, steel pins, button hooks, and that wooden club is a handled darning egg, for mending socks. I've mended a few socks, but now I just replace them. Eight pairs for $10 at Target, they're not worth mending!
It reminded me, have I shown you this? It's an old sewing machine demo model that used to belong to my maternal grandmother. My sister, Laura, gave it to me earlier this year. 
I've cleaned it and oiled it so everything moves,
but I haven't tried to make it sew, yet!
All these treasures have gone to live with antique notions I'd brought home from my paternal grandmother's house years ago. They live in this cabinet, made by my youngest son in High School wood shop. Note the old iron being used as a bookend next to the cabinet. I bought it at a thrift store, thinking it would be good to have a hot, dry iron for pressing seams. Lucky I didn't burn my house down, it gets so hot! The end sitting on the ironing board burned a hole right through the ironing board cover!
Peek-a-boo!
Inside the cabinet there are more of the usual old or antique sewing notions: thread, buttons, snaps, needles, thimbles. I love those little black paper packets of needles and the wooden spools of thread. There are buttons in a jar on another shelf, and cards of bias tape and rickrack in a drawer. Seems like everything was labeled 29¢.
There are a few unusual items, though, worth taking a closer look.

Here are some needles, probably for threading laces through stays and corsets. One is (very tarnished) silver, one is mother-of-pearl, and the others are whale bone. From Massachusetts, you know. 
This is (again, very tarnished) a silver, folding measuring stick. Look closely at the case (the lid is missing) and you can see newsprint under the leather, forming the shape of the case. 
And though they don't have anything to do with sewing, these little shoes are stuffed into the cabinet, too. They were worn by my father when he was a baby. Hard to imagine!

I'm linking up with Beth's Sewing Museum Linky Party at Love, Laugh, Quilt, because showing off  sharing our own little sewing museums was her idea! I look forward to seeing the goodies others have posted!


Monday, June 17, 2013

feathers


I wanted to name this post "the birds and the bees," referencing this quilt block and the ladies in my online quilting bee who are making it . I named my last post "Orphans," which attracted lots of traffic to my blog, but for the wrong reasons. I wonder what kind of traffic and comments I might get with "the birds and the bees" as a title!

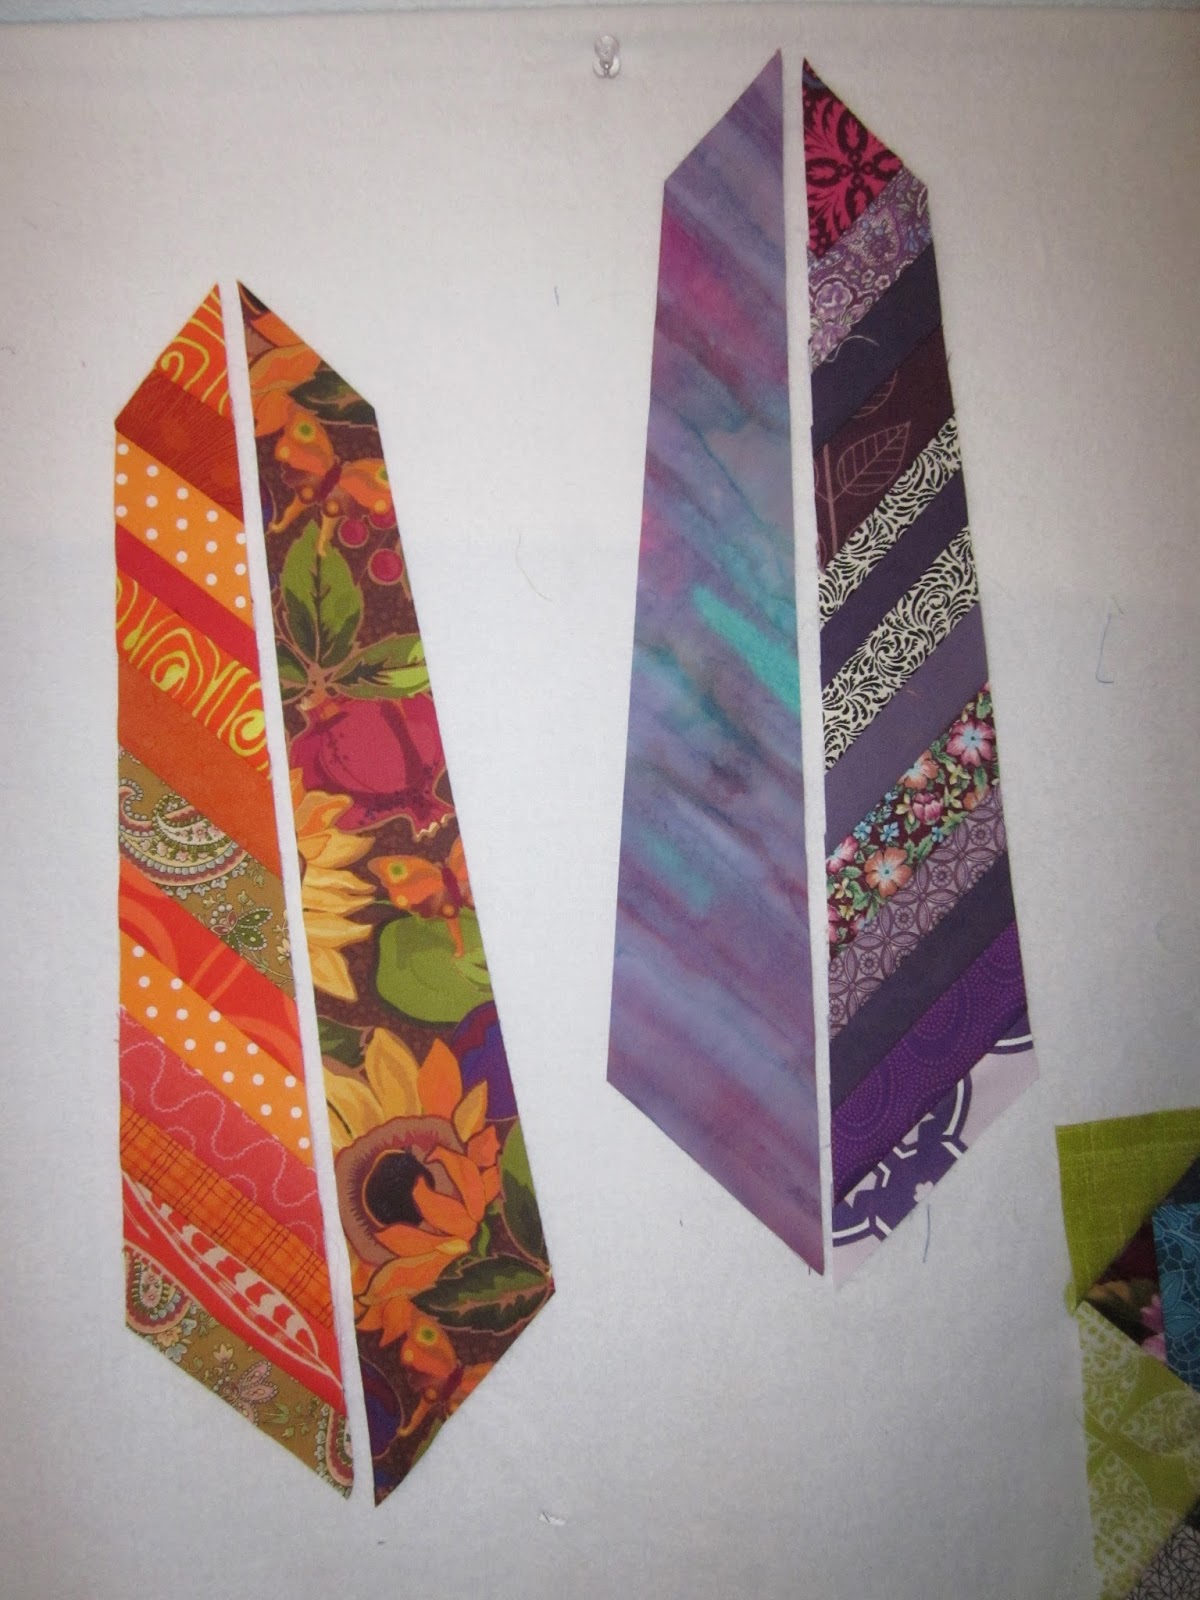
July is my month for our Stars in Their Eyes bee. (This is an online group of friends who take turns making quilt blocks for each other.) I’ve chosen Anna Maria Horner’s Feather Bed block, one that really caught everyone’s attention when it was introduced. I’m really excited to see my friends’ creations of this bold and colorful block!
Sam of Cup of Tea and a Slice of Cake has already made two blocks for me, here's her first!
The instructions for making this block start with making a fabric strata (a lot of fabric strips sewn together) to cut multiple vanes (side sections of the feathers) from. Since I’m asking my friends to make two feathers for me, and variety is a goal for these feathers, it makes more sense to me to paper-piece the individual sides.

On my first try, I pulled out a pile of strings from recent projects. Most of them were 1” to 1.5” wide, and the vanes ended up taking 12-16 strips to finish. It created a dense texture, and since I was experimenting with monochromatic strips, they’re kind of serious looking. I thought they were too dense to make both sides of a feather like this, so I paired each vane with a single fabric for the other side.

The feathers in the pattern, and the feathers Sam made already are bright and colorful, I like them better than my first attempt! So I tried again. This time I pulled out 2.5” strips, and looked for color contrast between the strips. Here’s a suggestion: I paper pieced the vanes, and removed the paper before I trimmed the shapes, because the bias edges stretch out of shape easily. After I removed the paper backing, I traced another pattern piece onto freezer paper, then ironed it onto the sewn-together strips, placed my ruler on top of the pattern,  and cut out the shape. Freezer paper has a waxed backing that adheres to the fabric when ironed on, and it peels off easily without leaving any residue. That made it easy to line up the pattern piece with the strips angled correctly, and to cut without the pattern shifting.


Another suggestion is one Sam made: cut the background pieces bigger than you need, so you don’t have to get the angle and alignment perfect when adding the background to the feather. This is especially advantageous when adding the little wedges at the top of the feather.

You’ll notice, too, that I used two different values of Kona gray fabric for the backgrounds of the feathers I made, and they are different from the gray Sam used for the blocks she made for me. Any gray fabric is good for these feathers. *Black background fabric is acceptable, too.* Use what you have, what you think works best with your feather fabric. The quill, or shaft of the feather can be any neutral color, too.

When you’ve sewn together the feather and the background, I’m asking my friends to send two unfinished feathers, not sewn together. Each feather block should be 9.5”x18.5,” but I won’t mind if they’re a little bigger, or even a little smaller.
I hope my friends will have fun making this block, just as we did making Lisa's x&+ blocks and Sam's Union Jack blocks.


Wednesday, June 5, 2013

Orphans, the fabric kind

It's the end of the school year, and Friday, May 24 was my last day of work for the school year, part-time intervention teacher for kindergarteners. No, wait, there was testing to be done, so I was called in to work the next week, and Thursday, May 30 was my last day. Oh... more testing, so I worked again on Monday, June 3, and that was my last d.... except that tomorrow is a mini conference day so I'll work as afternoon sub in kindergarten. And then I'm officially on summer vacation!

With all this off-and-on schedule, I've been snatching opportunities to tackle and finish small projects. I really enjoy being in the 3x6 online quilting bee, and I'm part of a really friendly hive again this quarter. Since our hive is specifically making star blocks for one another, and I've been making stars for the last few rounds of the bee, I was happy to find a star block that's a little unusual, but still not paper pieced.

I figured out how to make it after seeing it on Karen's Flickr! photostream, and found some focus fabrics for the centers, and knocked out the blocks in a weekend. Fun! (If you want to see them in more detail, visit my Flickr! photostream.)


In the last quarter of the 3x6 bee, our hive was so friendly, we formed our own bee, Stars  In Their Eyes. For May, Lisa requested X&+ blocks in a specific color scheme, intended for a baby quilt. These blocks are really fun to make! I wasn't satisfied just making two, because I was eager to see the effect of putting them together, so I made four. (To see the gorgeous quilt Lisa made with her blocks, look here!)
The X&+ blocks are so addictive, I decided to make some for myself, and to use up some of my scraps that were starting to overflow my scrap pockets:
I keep scraps in shoe storage pockets, hanging on the door.
You can see the greens overflowing here!
I cut scraps and kitted them up, and started making blocks.

I kept making blocks until I had so many, I had to make more, so there would be enough for a bed-size quilt. I think they lose a bit of their charm when there are so many, but I'm still planning a quilt big enough for a bed, a very utilitarian quilt.

Laid out on the floor for effect, not sewn together yet.

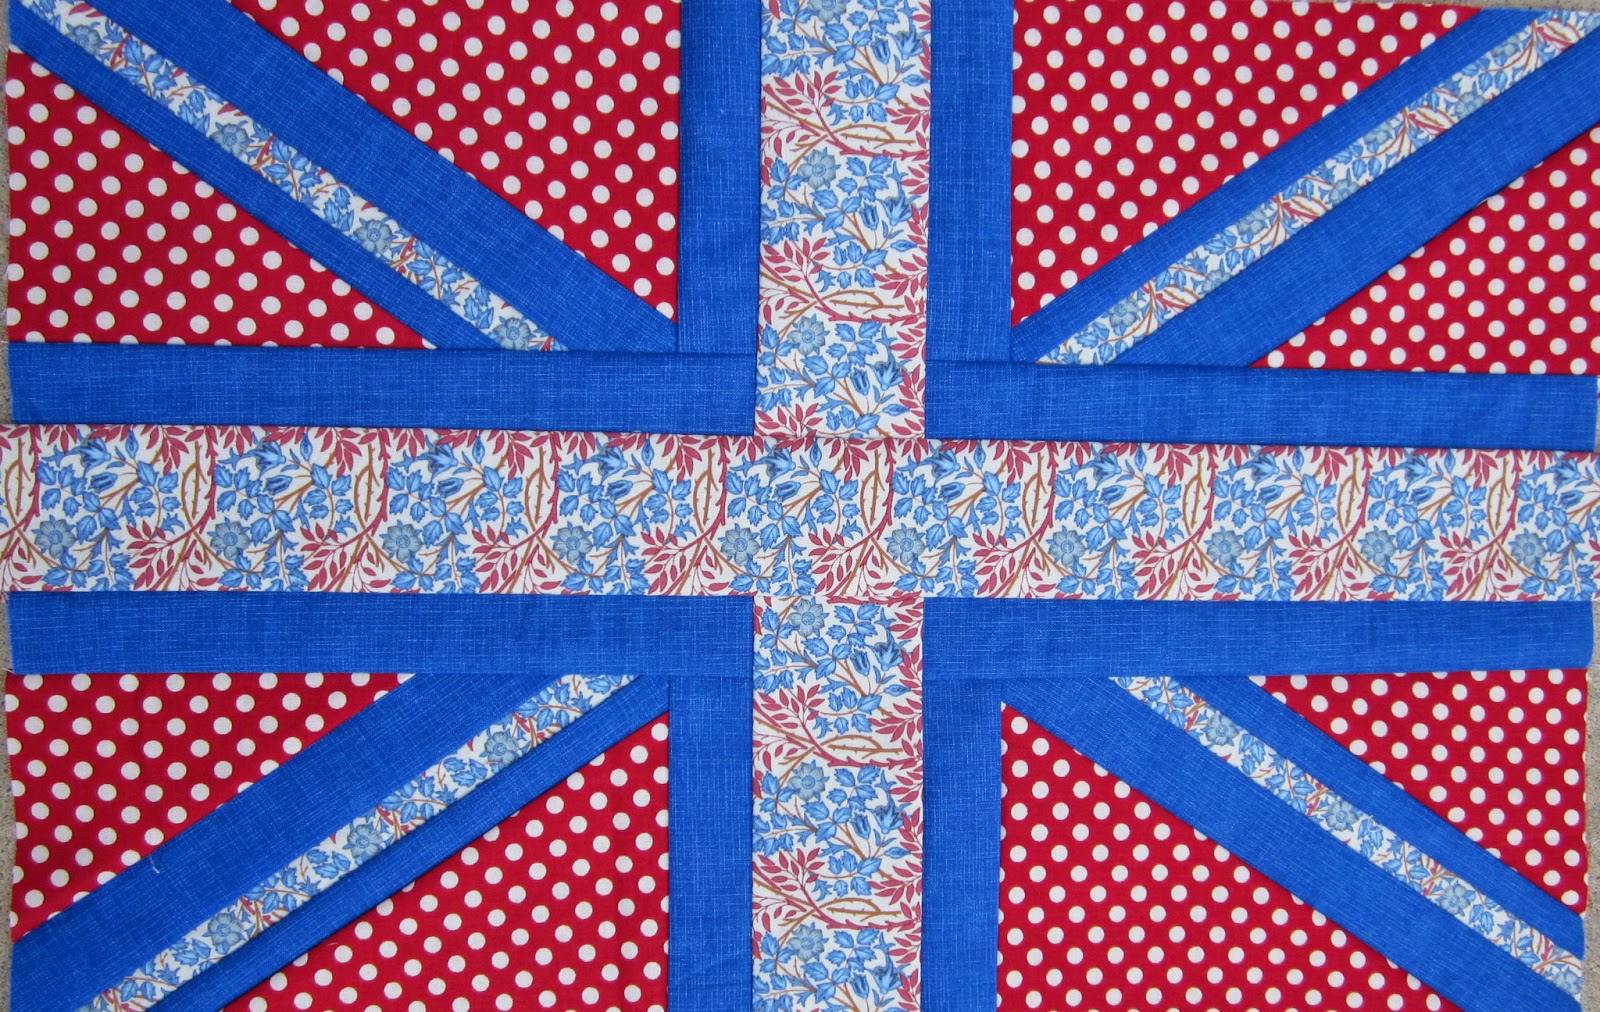
June is Sam's month for our bee, and she asked for Union Jack blocks. After cutting on the wrong lines and making one too small, I successfully made these blocks, and I think Sam's quilt is going to be very charming!


That too-small Union Jack block wasn't going to languish in my orphans basket. I quilted it, piped it, backed it, and stuffed it, and made it into a little cushion. 

Pebble quilting and kelp quilting finished this mish-mash of leftover parts, and it got made into a pillow, too. This time with a zipper.

Detail of quilting. 

The scraps from my zig zag quilt top also got made into a pillow cover. I may be late to the party, but I love how arranging the half-square-triangles by value (light/dark) creates the diamond design. 


Pillow back with zipper, quilted in diagonal grid.

Scrappy binding, quilting echoes the flowers on the backing.

Here are my no-longer orphan pillows at home with their family of LWR quilt and other cushions. 

Meanwhile, I've been giving sewing lessons to Gabrielle, initiating a new sewist into the stitching community. We started with a pincushion, then a shoulder bag, then a pillow cover with a zipper, and here she is with her first dress! I'm so proud!

Linking up with Finish it Up Friday!