Showing posts with label birthday. Show all posts

Thursday, July 12, 2012

New Finish

Pretty new finish: this design is Garden Fence by Hyacinth Quilt Designs, and all the fabrics are by Amy Butler. I started with the paisley my sister Pamela chose for her contribution to Grace's birthday quilt, and added other fabrics in pink and green.

Free motion quilted; a free-form flower shape centered in each square, with big, wavy petals, and leaves to fill in empty corners. FMQ means I move the quilt under the needle of the sewing machine, and draw a picture with thread. Just think of the way names are added to Mickey Mouse hats at Disneyland. 

Here's the birthday girl, getting ready to blow out the candles on her Baskin-Robbins ice cream cake. After all, we all worked at Baskin-Robbins in High School, except Pamela!

We celebrated Pamela's birthday in Flagstaff, staying at this beautiful cabin with this glorious view of the San Francisco Peaks. This is the geography of our childhood!

Notice the beautiful pine forest, it smells wonderful! 

 Here's the birthday girl, isn't she cute?

She likes it!

Friday, February 17, 2012

Who's Afraid of the Big Pink Quilt?


Poppy's quilt is finished, and on its way to Pittsburgh!
**** If you'd like to see lots of pictures of individual quilt blocks and quilting details, take a look here.****

A year ago I joined the 3x6 Mini Bee, an on-line group that makes quilt blocks for each other. It's a fun way to try sewing blocks using different color combinations, and to make friends with people around the world. I started receiving quilt blocks in pink and purple and rainbow colors, featuring prints and motifs a little girl would appreciate.

Finally, with Poppy's birthday approaching, it's time to turn these blocks into a quilt! 

After conforming all the blocks to the same size, and choosing a sashing to pull them together, I still had to overcome the obstacle of size: I really wasn't looking forward to wrestling a twin size, flannel-backed quilt under my machine to quilt it the way I envisioned. I did some research, and talked to the local quilt guru, and came up with a plan to use a form of quilt-as-you-go.


I'm working with a paper model here; I didn't take photos until I was well into the project, and a smaller model might help communicate the big idea. 

I didn't completely sew the quilt top together; I left it in three sections, each section had two rows of five blocks, with sashing in between.
I made the whole backing for the quilt.
Use your imagination here.
Each section on the left is ten 12" blocks with sashing.
The yellow is a 70"x96" pieced backing.


First the middle section of the quilt top was plunked down onto the middle of the huge backing, with a section of batting in between, just enough to fit, with an inch or two sticking out all around. Pin basted.
I machine quilted each block, first using stitch-in-the-ditch along the sashing and on all the straight lines in the blocks.
Remember, this paper model represents  a 30'x70" quilt section!
Then I got out my Free Motion Quilting foot, and had fun experimenting with different shapes. All the white background spaces are FMQ in a meandering stitch, and in the colored areas I quilted flowers and stars and circles and feathers and loops and swirls! I was working on the middle of the quilt, but with only the backing rolled up in the harp of the sewing machine, without the bulk of the remaining quilt top and batting.
When the center section was thoroughly quilted, I added the bottom section and quilted it, then the top section. Let me show you how I added the other sections!

You can see the quilt-in-progress spread out on my ping pong table, the backing for the upper section hanging over the edge. The quilted middle section is spread out, and rolled up in the background is the quilted lower section of the quilt.
I'm pinning the next section of the quilt top, right sides together, to the already quilted center section. 
Remember, the quilting has cinched up the already quilted layers,
so stretch them out so the new top section goes on smoothly.
Match up the sashing!


Then I take it to the machine, and stitch through all layers: new section of quilt top (face down), middle section of quilt top, middle section of batting, backing.
Notice the backing rolled up on the right.
Then back to the ping pong table, where the backing is stretched out and taped down, and you can see the quilt top section ready to be folded down.

Batting is laid out on the backing, ready to go under the upper quilt section.
The new batting is attached to the edge of the middle section batting. It's okay for the edges to overlap a bit, unless you have especially bulky batting. Just whipstitch the batting edges together.

Smooth the new quilt top section over the batting. You can't tell here where the top is joined except that the blocks in the top right corner of the pic have already been quilted, and the two rows of block in the foreground have not.

Pin baste or spray baste the layers together, then quilt as desired. 
I used the same method to add sashing to the sides of the quilt, and to add borders to the top and bottom ends. 

The point of this technique is that with a full size backing, I could work on a section of quilting at a time without manipulating three heavy, bulky layers all the time, and there are no awkward joins that have to be covered, hand-stitched, or disguised in any way. No shoulder pain, no sewing machine getting pushed around on the table!


**** If you'd like to see lots of pictures of individual quilt blocks and quilting details, take a look here.****


Sunday, January 23, 2011

Family time

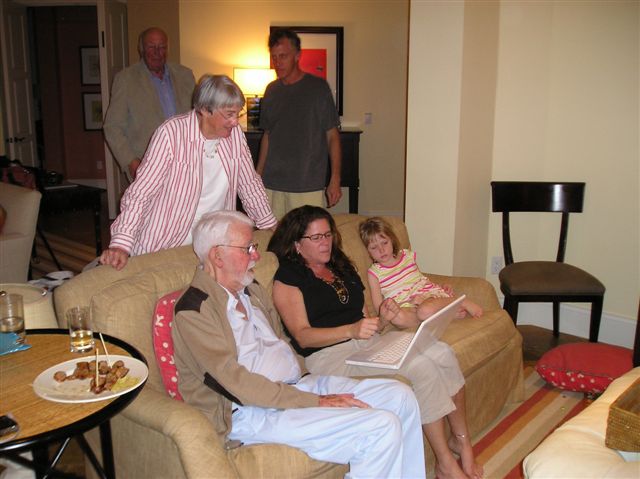
I had a great time last weekend in Florida, celebrating my dad's 80th birthday.
The banner on the wall said
"Growing Old is  Compulsory,
Growing Up is Optional."

I loved being there with all my sisters and my mom. 
Barefoot Beach, where the seashells are plentiful and beautiful!

Lots of talking and hanging out together!


Happy Birthday, Dear Old Dad!
Edwin A Carter, my dad.

Friday, October 29, 2010

she's an official grown-up, now

Mirror, mirror on the wall, what have they done with my hair?

My baby-lamb turns 21. Lamby, Lamby-girl, Lambelina. When she was born, we lived across the street from dear friends who also had school-age kids and a new baby girl. Their Sophie was an unhappy, crying baby, and mom, S, would sigh, and laughingly exclaim, "Oh, there's my sweet, gentle lamb, calling to me." Somehow, the irony of her comments made me see my own easy baby as truly a sweet, gentle lamb. The description became a name, and evolved into many variations of the same. Before Kathryn introduced us to her boyfriend, she told him we'd call her Lamb, and they gave each other a sweet and noticeable glance when we did.
Hello, can we set up a play date?

Cali girl does Canada
We also call her Catalina, Katerina, Katwin. 

Junior High style!
High School hipster

Love you, Lovey. Happy Birthday, Kathryn.

Friday, February 26, 2010

Her Cheery Outlook

I call this quilt "Her Cheery Outlook" in honor of my sister, Laura, and because I couldn't think of a more clever name!

Laura's birthday quilt, in process:


My sister Laura; she's a wonderful person who brings great joy to friends, family, and her students. She's very creative/crafty! Since her college days, she zealously protects her Ornament Therapy Weekend; a time when she and her college buddies gather and make crafts together for Christmas gifts, while enjoying food and libations and laughter and all that comes with longtime friendship. Sounds, wonderful, doesn't it? And every year, I love being the recipient of those OTW products! This year, a personalized wonderful calendar with photos and rubber stamping and family birthdays already marked, so awesome. Previous years include holiday aprons, accordion book with favorite family recipes, and embroidered felt Christmas tree ornaments, and many other treasures. And sometimes there's a Valentine's or Easter or birthday surprise, or something for no special reason. Lots o' love!
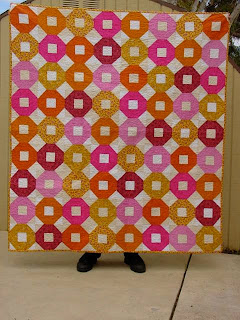
Laura just spent a year celebrating her birthday, number five-oh! And my newfound enjoyment of quilting easily found inspiration and aspiration to make Laura a birthday tribute. I didn't pull it together in time to stay inside that birthday year, but no one minds, right? I wish I could find the quilt online that inspired this one; it's a combination
of sophistication and quirkiness,
tradition and innovation, exuberance and order.

When we were teenagers, Laura's bedroom was decorated in pink and orange, in the 70s lazy daisy motif. These colors reminded me of our girlhood, plus I just love their joyfulness! This yellow I used for binding and in some quilt blocks has a smidge of gold ink; it's actually a Christmas fabric, a nod to all the Christmas presents Laura has made! Ellie-the-niece recognized this pink swirly fabric as a remnant from her Christmas present!

You can see the background is a few different whites, giving the quilt another depth of expression. I saw that idea in my inspiration quilt, and appreciate the freedom to not have everything matching and even. I'm also really happy with the stippled quilting, my second time free-motion quilting on my sewing machine.